The Diamond Shelter
|
|

|
|
|
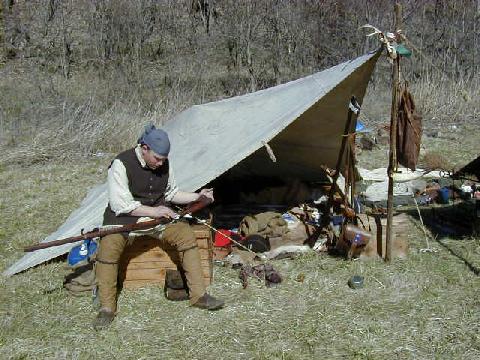
There are many types of shelters used at rendezvous. They range from small simple affairs to the elaborate. Wall Tents, Wedge Tents and the Bell Wedge Tents, Baker Tents and Whelan Lean-To Tents, Pyramid and Marquee Tents. And of course the Tipi. All of these lodges serve their purposes to those individuals who use them. Many are enclosed and can have wood stoves for the cold weather events and provide privacy that can be essential for families and the women folk. Many can be opened up during the daytime to double as a "Traders Tent". The Tipi of course has always held a certain allure and romance for folks involved in the rendezvous thing. They are completely self contained and self-sufficient. With a campfire built right inside in the middle of the lodge one has needed heat and cook fire all rolled into one. I have spent a weekend or more in most of these types of lodges at one time or another. I owned a tipi for a few years and can attest to how great tipi living is once your set up and ready to go. But that's where the problem for me came in. The setting up. Load all your gear in the truck. Then load all the poles on top. Go to the rendezvous and unload all the poles and then sort them out. Then unload all the gear. Take a break because you're all worn out by now. Then start raising the lodge. Well it just seemed that after a while, this all began to be work and I am at rendezvous to enjoy myself. I have all week long to work. I found the last year and a half that I owned that tipi, I'd be going about the task of getting ready to pack for a rendezvous and I would look at it and all the poles etc. and say: "To heck with it, I'm taking my diamond." Which brings me to what I'm meandering about here. The Diamond Shelter. A simple but also great lodge/tent for rendezvous is the "Diamond Shelter." Generally this is a square piece of canvas (but there is no rule it must be square), three corners staked to the ground and the fourth lifted up on a pole. Add to this a means to sort of lift the center and you have a dandy but simple little shelter. And for those just getting started or on a tight budget, it's about the cheapest way to go. It's simple and quick to set up and tear down and pack up and has become my favorite type of shelter. I have two. One is my original 12' x 12' that I made myself and the one I use the most. The other a 10' x 10' purchased from Panther Primitive that I use for when camp must be packed in. A 10' x 10' Diamond from Panther Primitive or like tent manufacturer can be had for less than $150. Or one can be made for a whole lot less. A diamond is easy enough to make. I made mine from a good thick canvas 12' x 15' painters tarp I purchased for $25 from a local paint supply store about ten years ago. I cut it down to 12' x 12'. The remaining canvas was used to make a ground cloth for my bedroll and the remainder of that was made into a haversack. Before I go further here, let me say that you would want to make sure it is a good heavy canvas with a tight weave. To make it I cut it down as I said to 12' x 12' (You can go any size you want). I would suggest that if you can find a laundry mat with a commercial sized washer and dryer, run it through both at least once if not twice to "tighten" the weave. If this is impractical, hose it down thoroughly until soaked and then sun dry. I'd even repeat this at least once. Now I needed to sew a seam on the side where the excess was cut off. Many of these "painters tarps" are just a hodge-podge of pieces sewn together. On mine these seams were not well sewn and needed a little sewing work to clean them up so that they would not invite leakage during rain. I left my canvas white when I made mine, but the next one I think I might walnut dye and this would be the point where you would do this. The next step would be to waterproof the canvas. I have been involved in many discussions on how to use some "period correct" formula or another to waterproof canvas. Most of these consisted of boiled linseed oil and turpentine or other such mixtures, all of which in the long run may water proof canvas as well as make your canvas perfect for making period torches which should burn half the night. There are occasions where I will toss "Period Correctness" to the wind for safety and as my son would be sleeping under this canvas, this was one of those times. I went to my local Army Surplus store and purchased a good canvas waterproofing called Sure-Cote. It cost $16 a gallon and one gallon was plenty for my job. I laid the canvas out on my patio and put half the Sure-Cote in a pump up style bug sprayer. I sprayed the canvas evenly until the entire half-gallon was covering this side of the canvas. I flipped the canvas over and repeated the process on the other side. Once thoroughly coated I loosely rolled up the canvas and placed it in a clean trash can placing the lid on it for around 72 hours to make sure the Sure-Coat soaked into the canvas as thoroughly as possible. I then pulled it out and laid it back out on the patio in the sun to dry which only took a couple hours. My canvas was waterproofed and though not exactly done in a "Period Correct" manner, it is safe and the waterproofing invisible to the eye. The next step was to sew the loops on the four corners and then a few along the sides that would be placed down on the ground. Cut a pole 5' or 6' long and your basically set. You will want to help raise the center, as it tends to sag a bit when set up. This can be accomplished a couple of different ways. One would be to use a short center pole inside. Another would be to sew on a loop in the center while sewing on the others. This loop can then be used to lift the center by means of a rope either tied to a tree above the shelter or to another pole added at the back with the rope stretched from the front pole, through the loop and then to the second pole and then stretched down and staked to the ground. Also, if a little more privacy is needed, two wedge shaped pieces of canvas cut to size can be added to create door flaps for the opening. In colder weather I drape my 10' x 10' diamond over the 12' x 12' diamond in such a way as to close off one side of the opening and then tie it down. A small fire built near the remaining opening does well enough to keep things pleasant. This 12' x 12' shelter was made at a cost of about $41 plus a donation to Uncle Sam. As I stated this was done around 1993 or so and the cost of the materials may be higher now, but should still be quite affordable. This shelter can be set up in the standard fashion on one pole or can be erected in almost any manner that one can conceive. Two corners can be staked down and two lifted up on two poles or two poles with a cross pole for strength. It can be stretched out from a canoe laying on it's side......one only need apply a little imagination. In any case, this type of shelter can be done cheaply and makes for a good starter lodge for the newcomer or a great permanent lodge for the one who wants simplicity. |
|
|
|
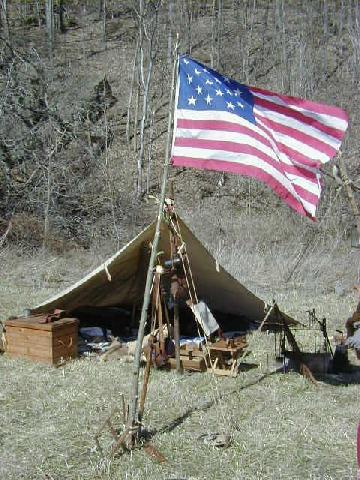
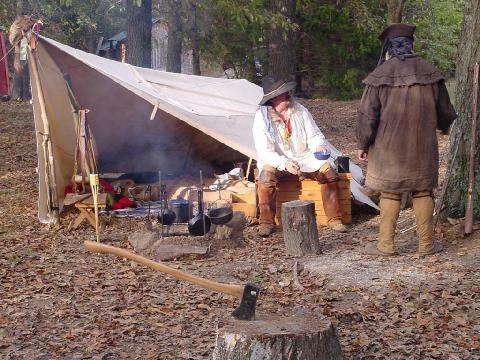
Two pix showing a frontal
and a side view of my Diamond Shelter. |
|
|
|
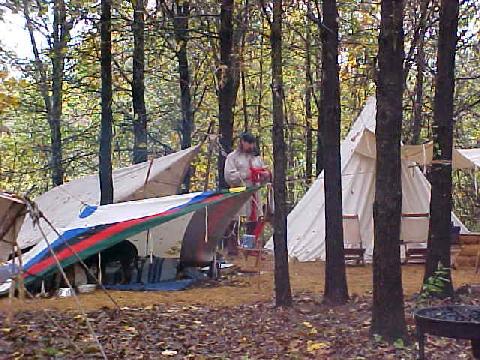
Three different diamonds
done different ways. Mine on left is made from a painters tarp and waterproofed
with a commercial canvas spray-on waterproofing.
The one in the middle is from a truckers tarp which was lost by an 18 wheeler on the side of the highway and found by my buddy. It is green from whatever type of dye was used by the tarp manufacturer and is waterproofed by the same. The one on the right was made from canvas (source unknown to me) and water proofed and dyed by being painted with a homemade recipe. Note also that this one has two attachable flaps added so it can be enclosed. |
|
|
|
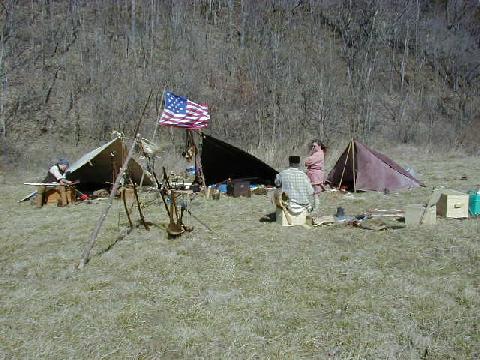
Here two Diamond Shelters
are set up side by side and another piece of canvas is stretched between
them. Any number of things, limited only by your imagination can be
done setting these things up.
|
|
|
|
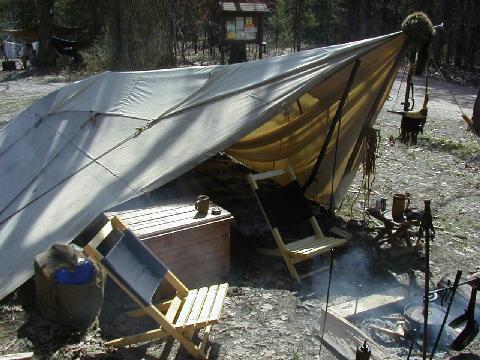
Here are two pix showing
how one side of the opening on my 12'x12' Diamond Shelter can be closed
off with my 10'x10' diamond draped over and tied down which can be real
handy during cold, rain or snow.
|
|
|
|
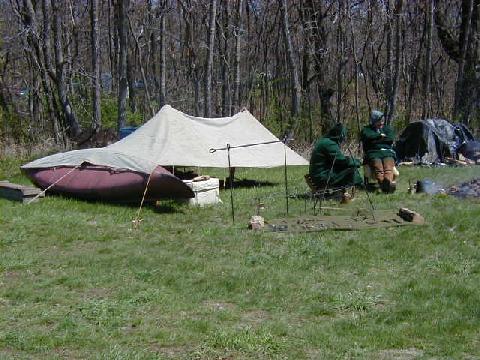
Here are two pix showing
how a shelter can be made by stretching a Diamond across from a canoe,
the two paddles used as center poles.
|

|
|
|
This pic shows that you
can go for flash if you want and paint the Diamond Shelter up to make
it unique. Again, you are only limited by your imagination.
|